Friday, 27 June 2014

Helping out with ATLAS Tile Calorimeter Demonstrator

In May this year I moved to CERN in Switzerland for 3 months as part of my studies at University of the Witwatersrand. I have since joined the ATLAS Tile Calorimeter Demonstrator project Group and been helping out where I can. Their aim has been to design, build and install a Hybrid Demonstrator prototype that will replace the aging front-end electronics from 1 to 3 slices of the ATLAS TileCal before RUN 2 begins in 2015. 

The entire LHC is in the process of being upgraded, by 2024 Phase II will begin where the beam energy will be increased to √s = 14 TeV and particle luminosity by a factor of 5. This will potentially address the unsolved mysteries such as dark matter. The demonstrator system needs to be fully compatible with current detector electronics as well as act as a validation for the new read-out architecture (Hybrid Design). Once fully upgraded the data output from the ATLAS TileCal will increase by 200 times to estimated 40 Tb/s!!

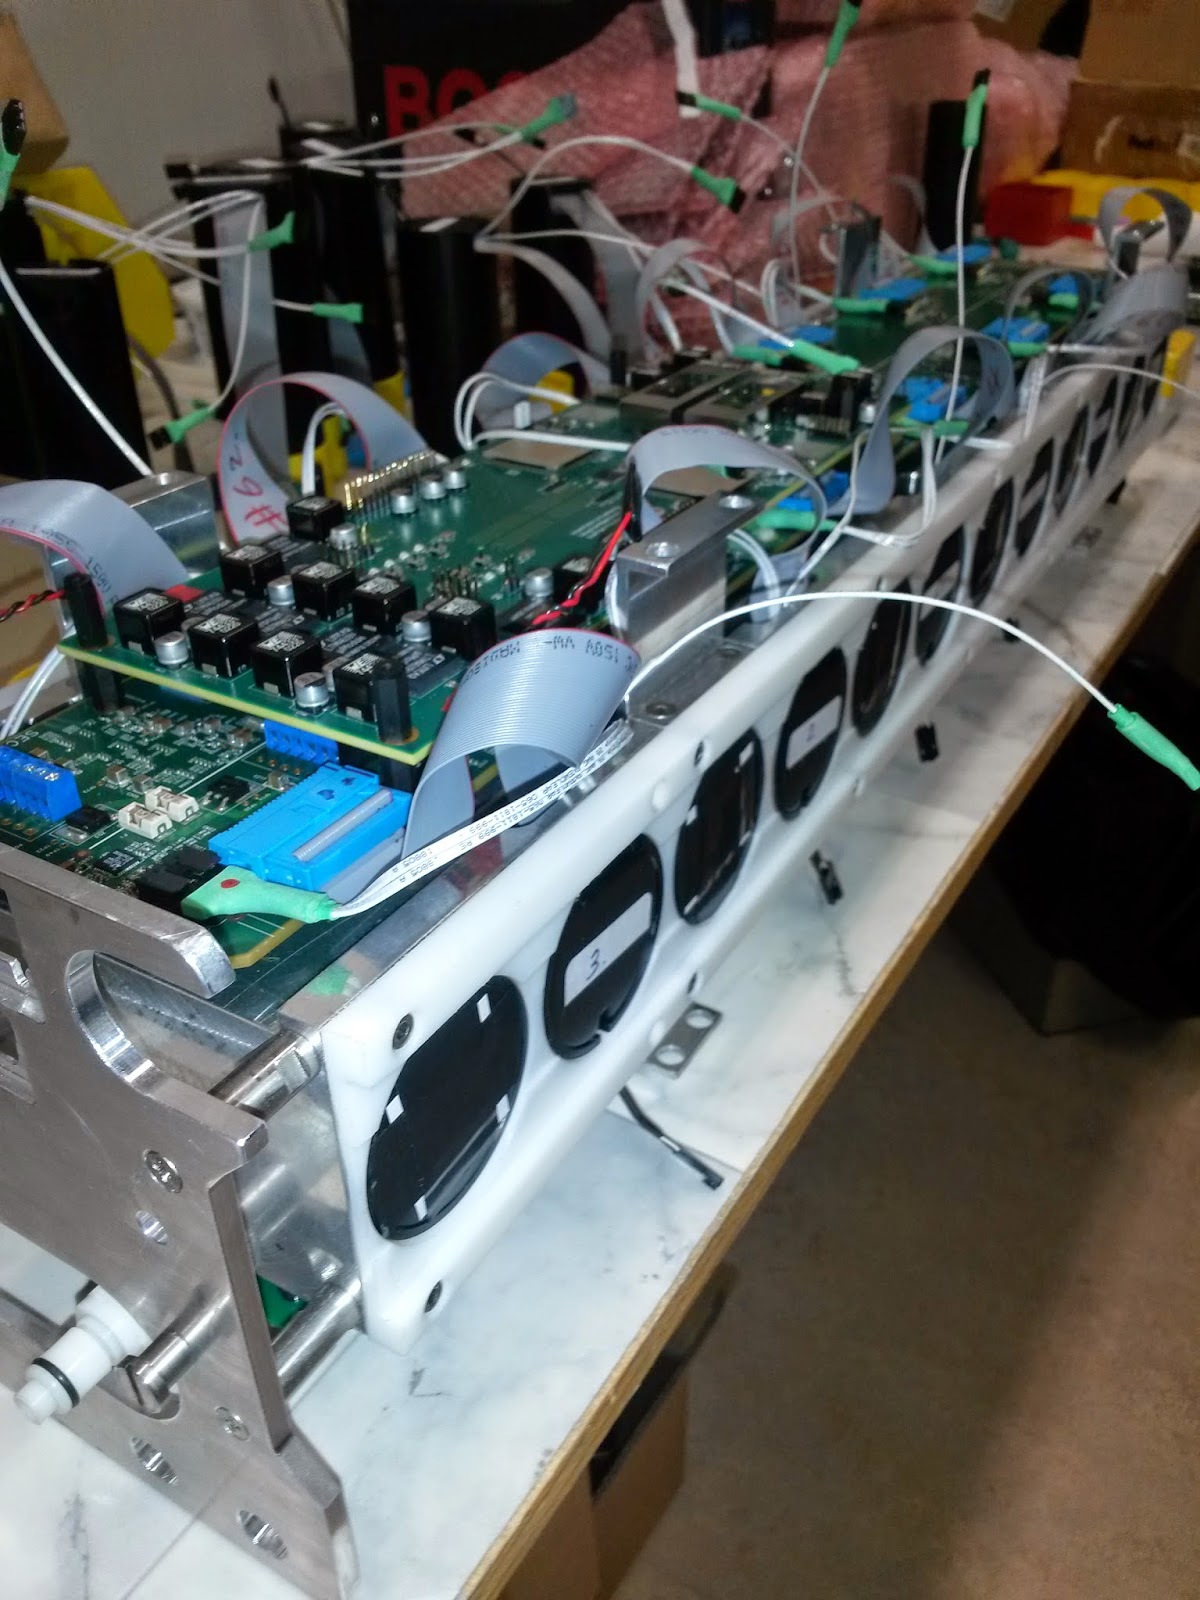
Earlier this month CERN had its second TileCal expert week of the year. Experts from around the world came together to help with the build of the first fully assembled Hybrid Demonstrator “Superdraw” prototype. A superdraw is composed 4 separate “minidraws” each that are independent in terms of power, readout and configuration. A total of 45 PMTs, 4 Motherboards, 4 High voltage Cards and 4 Daughter boards were needed to be assembled and connected together. The week was very successful with many new problems being identified as well as confirmation that all the components fitted together correctly and that the entire draw was able to fit in a slice of TileCal. Below are a few photos from that weeks assembly.


Newly built PMTs ready for use.


 Fully Assembled Minidraw.

Demonstrator Superdraw ready for testing.


 Insertion of the Draw into a Test Slice of the TileCal.

Thursday, 26 June 2014


South-African made cryostats have arrived at the Joint Institute of Nuclear Research located in the Russian city of Dubna, in the Moscow region. This is an important demonstration of South African capabilities in the area of accelerators. The photo is a courtesy of Prof. Jean Cleymans (left).


Today is the meeting of the LHeC International Advisory Committee. Right now we have the open session with overviews of the project, Higgs physics, performance, civil engineering and accelerator development. The meeting is chaired by Prof. Herwig Schopper. A number of prominent people are attending. In the afternoon the closed session will follow.


Wednesday, 25 June 2014

INA219 on ARM Linux (Wandboard)

I mentioned in a prior post that I integrated an INA219 power measurement IC onto the power distribution board of our Wandboard cluster. It took quite a bit of scratching around to get it to work though! It's actually very simple so here are the steps in case they save someone else a few hours.

The first step is to compile the kernel with TI INA* support. This can be as a module or built-in. I chose the module route so that I can check that the module loaded with the lsmod command. Here's a screenshot of the Linux menuconfig showing the option you need to enable:


Loading the Module and Setup

Once your system is back up and running, it's a simple matter of loading the module and doing some setup. You could put this setup stuff in a script that runs on startup.

modprobe ina2xx
echo 'ina219 0x40' > /sys/bus/i2c/devices/i2c-2/new_device

I connected the I2C from the INA219 IC to the I2C3 (i2c-2, above) port of the Wandboard. I also powered the INA219 with 3.3 V, taken from the Wandboard external expansion headers.

Reading Power Values

Simply type:

cat /sys/bus/i2c/devices/2-0040/power1_inpu

And you will see a large number. Divide this number by 1000000 to get the power in Watts. You can also run sensors if you have lmsensors installed. Awesome!


Tuesday, 24 June 2014

ATLAS Prometeo System ADC Board


The Analog-to-Digital Converter (ADC) board for the Prometeo system for the Tile Calorimeter of the ATLAS detector has arrived at Wits. The PCB was manufactured at Central Circuits and the mounting took place at Projects Concern in the Gauteng area. This is the last piece of electronics needed to complete the Prometeo system. Oscar Kureba will now test the prototype in conjunction with a FGPA-based board to ensure the functionality of the board is as expected.


Friday, 20 June 2014

Visit to PCB Manufacturing Plant

Robert, Mitch and me visited a plant in Centurion, near Pretoria,  where PCB prototypes have been manufactured for our work with the Prometeo system at CERN. So far we are happy with the interaction and the quality of the PCBs. We will continue working with them. The visit was very instructive in terms of how the process of manufacturing PCBs works and what are the different steps involved in it. It was also very useful in terms of understanding the capabilities and limitations.


Freescale P4080 PCIE Development Board

Yesterday we received a Freescale P4080PCIE development board! This board features a Gen2 PCI-Express x4 link, as well as 2 SFP+ connectors for some high data throughput (~20 Gb/s) experimentation. The chip itself is an eight core PowerPC (or something pretty similar) with loads of I/O connectivity and the ability to attach loads of RAM! This is the chip you can expect to find in very high-end routers...


Thursday, 12 June 2014

sROD Prototype


We would like to share with you that an important milestone has been fulfilled for the deployment of high-throughput electronics to the ATLAS detector at CERN. Please find attached a photo of the first prototype of a FPGA-based card for the Tile Calorimeter of the ATLAS detector. The next and final prototypes will be manufactured in South Africa after debugging of the prototype in the  picture is finalised. The cards manufactured in South Africa will be used to take data with the ATLAS detector as a part of a demonstrator. 


Friday, 16 May 2014

32 Core - 8 Wandboard Array Rack Mounted

We thought it was time to make our Wandboard Array a little bit more formal. We purchased a small tray for our rack and started work on mounting the array next to its power supply.

Thanks to the Wits Physics workshop who did a great job with mounting the power supply and brackets.

Final Wandboard Array installed in rack.

Wandboard array fresh from the workshop.


Tuesday, 13 May 2014

Extra Steps for Building a Wandboard (i.MX6Q) Image

I have built several Linaro based images for the Wandboard or Freescale i.MX6Q SoC, and it's a seemingly simple process of building the kernel, partitioning and installing the Linaro rootfs to a SD card. One hit's a wall when anything 'fancy' needs to be done on this image... this post aims to document how to finish off the image so that it can be used for kernel development and other advanced tasks.

Please note that this is a fairly advanced howto. Most of the concepts here can be found in other places online. The methodology behind the i.MX6 libraries comes from 'reverse engineering' the LTIB install scripts from Freescale, yocto, and lots of reading. I'm sure there is a better way to do this - but I don't know it (I'm interested to hear though)!

Linux Source Code and Modules
The Linux kernel source code should be cleaned (make ARCH=arm clean) and copied onto the image (or SD card - I'll use the terms randomly) into the /usr/src/linux directory.

Before you clean the tree, build the modules and headers and install them to a known path to be copied onto your SD card root filesystem.

make modules_install INSTALL_MOD_PATH=/some/directory/

make headers_install INSTALL_HDR_PATH=/some/directory/

Copy the contents of /some/directory to into the SD card /lib directory. You should now have a new directory: /lib/modules/3.0.35Linux+ or something similar. The headers_install directory goes into /usr.

When you boot with the new SD card, you will need to modify some symlinks (build and source) that reference the wrong place (they will be linking to directories from your build machine, which are obviously not valid any more).

cd /lib/modules/3.0.35Linux+/
ls -l

You should see the wrong links. Now to remove them and re-add them, correctly:

rm ./build
rm ./source
ln -s /usr/src/linux ./build
ln -s /usr/src/linux ./source

These commands will have to be run with sudo or as root.

Something you may also have to do, in case you cleaned the kernel source tree too thoroughly, or you cross compiled (the kernel scripts directory is full of x86 binaries which wont work on ARM: modpost, etc.), is ensure your proper .config file is there and run:

make ARCH=arm oldconfig
make ARCH=arm prepare
make ARCH=arm modules_prepare

I've also found that doing a module build fixed up some errors!

make ARCH=arm modules

Download the i.MX6 Libraries
Download and extract the Freescale BSP somewhere onto your PC (not the Wandboard). There is a source directory with loads of .gz files for various applications. We are interested in several of these. This section will explain how to install the important ones.

A list of the files we will be working with is below. Copy them onto the SD card before booting, or SCP them across. From what I have seen, the 3.0.35-4.1.0 and 3.10.17-1.0.0 are basically the same. The 3.10.17 files can be acquired from a partial yocto installation - Google can probably help with finding the files otherwise!

imx-lib-*.tar.gz
imx-vpu-*.bin
firmware-imx-*.bin
imx-test-*.tar.gz
gpu-viv-bin-mx6q-*hfp.bin (the version from the Freescale BSP seems to be soft-fp... it won't work.)
gpu-viv-g2d-*.bin
fsl-gpu-sdk-*.bin

Some of these are bins, with things to agree to before they extract. Go ahead and extract everything in preparation for the installation steps.

Install the i.MX6 Libraries
First, a few exports to make our lives easier:

export KERNELDIR='/usr/src/linux'

export INCLUDES='-I$KERNELDIR/include -I$KERNELDIR/drivers/mxc/security/rng/include -I$KERNELDIR/drivers/mxc/security/sahara2/include'

As per the usual, make sure the KERNELDIR variable points to your specific kernel directory. Note that if you have installed the kernel headers, etc. properly in the steps above, you may not need to do these exports and you can leave the INCLUDE= part out of the make commands below.

firmware:

Simply copy the contents of the firmware-imx* directory into /lib so that you have new files in /lib/firmware/vpu, etc.

imx-lib:

From the imx-lib directory:

make -j1 PLATFORM="IMX6Q" INCLUDE="$INCLUDES"

sudo make PLATFORM="IMX6Q" install 

If all compiled and copied, you should now see a bunch of new libraries in /usr/lib! Congratulations!

imx-vpu:

Even if you don't want to use the VPU, this is a dependency for the imx-tests. From the imx-vpu directory:

make -j1 PLATFORM="IMX6Q" INCLUDE="$INCLUDES"

sudo make PLATFORM="IMX6Q" install 

If all compiled and copied, you should now see a bunch of new libraries in /usr/lib! Congratulations!

gpu-viv-bin and gpu-viv-g2d:

Copy the contents of the archives into your root. /opt and /usr will now contain new files.

imx-test:

From the imx-test directory:


make -j1 PLATFORM="IMX6Q" test

At this point you can run some of the unit tests that compiled successfully (not all will have) from the ./platform/IMX6Q/autorun*.sh files.

sudo make PLATFORM="IMX6Q" install 

If all compiled and copied, you should now see a bunch of new libraries in /usr/lib! Congratulations!

gpu-viv-bin:

The GPU drivers and binaries are closed source, so it's a matter of extracting the files into the correct place. Search for gpu-viv-*.gz and copy it onto your Wandboard.

Boot, extract it and cd into the new directory. You will see an 'opt' and a 'usr' directory. Run the following commands:

sudo cp -Rv ./opt/* /opt/
sudo cp -Rv ./usr/* /usr/

Make sure the files copied into the correct places.